Open top menu
Wednesday, September 29, 2010
no image

Due to overwhelming response, we have decided to make the "Etsy Business Tool You May Never Have Heard Of" and ongoing series. If you haven't seen the previous posts ,there is now a link in the right side bar under Shop Busines Tools in the "Little Secrets" section.

UPDATE: Certificate Buddy is no more :( They company is no longer there, but you can still make Gift Certificates thru paypal. Just take a look at our posting "Company Gift Certificates" for info on how to make yours.

Certificate Buddy: is an website that lets you print and track gift certificates for your shop. One of the main questions always asked is how to offer gift certificates from an online store. The designers of this site tried to make it as easy as possible for the user, so the site automatically generates unique codes for your gift certificates, keeps track of which ones have been redeemed and has some gift certificate templates for you to use. It is free to sign up, BUT there are limitations. You can only issue 3 certificates a month, not more than $20 value and you can only use the free templates provided. There are two other price tiers ( Paid $25 and Premium $50) a month that offer 50 and unlimited certificates and both are able to use your own certificate designs.
If you don't know how the gift certificates will be recieved, we suggest signing up for a free account and test them out. If the average prices of your items is above the $20 maximum for the free account, why not use the gift certificates as "coupons", offering $5 discounts for certain products as a promo.

Web Resizer: is a nifty web based tool that resizes your photos for the web. One of the biggest annoyances that shop owners have is when you have spent your time creating an image only to find out that its "too big" or "wrong dimensions" for wherever you are uploading it to. This tool will take your image and save it in the requires size that you input. You are also able to make some simple photo edits like exposure,contrast, saturation and more.

WhosTalkin: is a site to find out who is "talking" about your shop in blogs. Much like Social Mention, you put your shop name, or url in the search box and every blog mention will show up.
The downside to this site is that it is only blog mentions, I prefer just putting the name in the Google Search Bar. At least there you can filter the results by date posted ( 24 hours, week, year, etc). Or with Social Mention , its not just blogs, but websites as well.
Read more
Thursday, September 23, 2010
no image


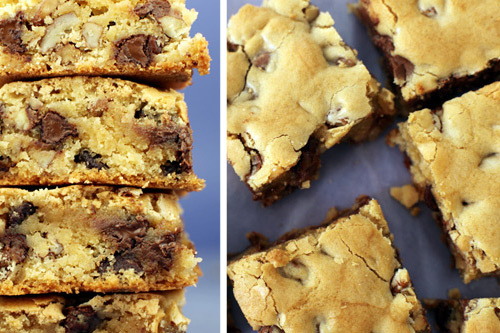
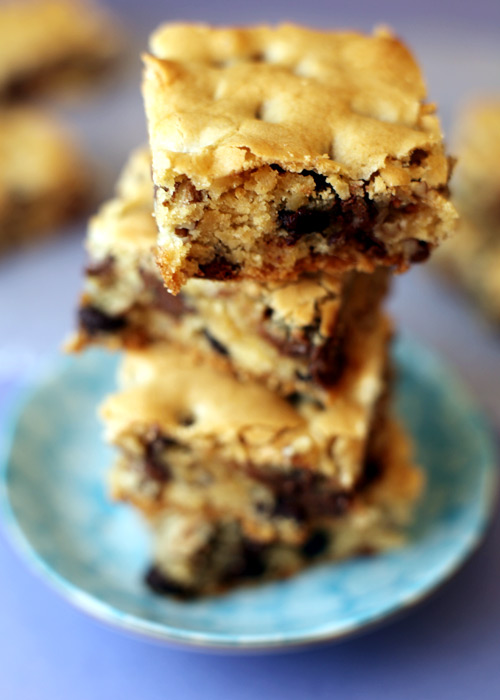
YES,Brookies....not quite a brownie, not quite a cookie...so they're BROOKIES!
These are brought to you via Bakarella, and the actual name is Congo Bars, but I prefer Brookies, lol. So head on over there for the recipe and tips on recipe,
(we have added basic recipe just in case link has problem)

BROOKIES RECIPE
____________________________________________________________

Congo Bars

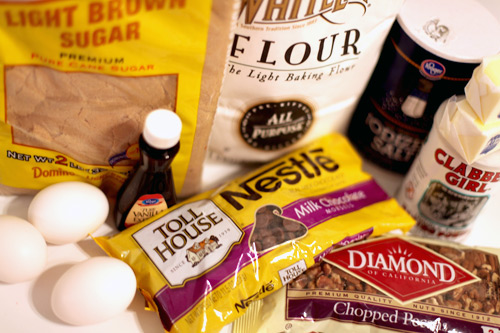
2 3/4 cup all purpose flour
2 1/2 teaspoons baking powder
1/2 teaspoon salt
2/3 cup butter, softened
1 lb. light brown sugar (Oh my and thank you!)
3 eggs
1 teaspoon vanilla
11.5 ounce package milk chocolate chips1 cup chopped pecans (optional)

By mixer:

Sift flour, baking powder and salt in a large bowl. Set aside.
Combine butter and sugar using a mixer until blended.
Add eggs, one at a time to sugar mixture, mixing on low in between each addition.
Add vanilla and mix.
Add flour and mix until combined.
Stir in chips and then pecans.

By hand:

Sift flour, baking powder and salt into a large bowl. Set aside.
Stir brown sugar into softened (not melted) butter in another large bowl until butter disappears. You can use the back of your spoon to help incorporate the two together.
Add eggs one at a time to butter mixture and stir well after each egg.
Add vanilla, chocolate chips and nuts. Mix well.
Add dry flour mixture and stir until well combined.

Coat a 13 X 9 pan with non-stick spray and spread batter evenly into dish.
Bake at 350 degrees for 30 minutes or until top is golden brown. Make sure you don’t over bake.


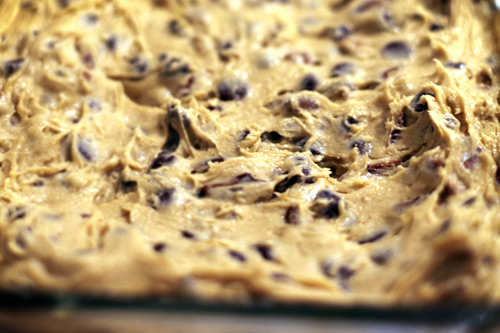
UPDATE: Hey guys. Seems some of you are having mixed results. Most find these awesome, but some say they’re not done at 30 minutes. I’m starting to think my oven runs hotter than most. So, if the bars aren’t done at 30 minutes and the tops feel like they are getting too brown, then place a sheet of aluminum foil on top and bake a
little longer. Use a toothpick to insert and check for "doneness" before removing from the oven. Also make sure you sifted the dry ingredients and used room temp butter, not melted. The batter should be thick like the photo above.

Read more
Monday, September 20, 2010
FUN PHOTO EDITORS: TAKING PICTURES TO  ANOTHER LEVEL

I am always on a quest to find a way to enhance as well as take better photos. If you have Photoshop and can actually use it , lol...then there is never a problem executing your own creations.
But for those of you who are not Photoshop proficient, there are several great online photo editors that can take your photos to the next level. These are not just for your business, they can be used for your blog or just a fun way to spice up those digital photos.


The following are some of the best


Loonapix: is on of my favorties, they have so many templates to choose from. Not only the more "stylized, artisic" ones but some very funny, celebrity interfaces as well..This one is a must see:)


beFunky: allows you to add some really lovely effects to your photos as well as the standard photo effects like lighten and darken. This easy interface allows the user to create great artistic effects without any " technical' knowledge.


piZap: is one of the more entertaining photo editors that allows you to either upload your own photos or use your webcam. Its free and online, so no need to download anything. If you want to see what it can do , just use on of the 4 demo photos and play around.


Photofunia:
is a hilariously fun web based tool that allows you to upload your photos and apply different cool effects to them. Scroll through over 100 different photo effects or if you are looking for something in particular selected the by "categories". Each effect has photo requirements and they state them right above the the upload button. When I tell you I had some fun with my pics, I really did! You can have a celebrity holding your portrait, to a large size banner in Times Square. This tool is definitely worth a look, just make sure to hit the "Download File" button, ad they usually have some add running above it and if you are not careful you could hit the ad for something.


Poladroid: is the easiest way to make a high resolution polaroid-like picture from your photos. You do need to download the "app" to your desktop (in the shape of a polaroid camera) but its free and small...This app is awesome!


My Heritage: is a web based program from the My Heritage geneology website that lets you upload photos and find out which celebrity closest resembles you. There is also a tool that lets you upload two photos and it will morph them together, so if you wanted to look like Halle Berry or Angelina Jolie, just put a photo of them in and it will morph you into them in a series of photos.

Write on It: is a web based free program that lets you create cards, make your own magazine covers (from major magazines like People, Wired, Redbook, etc) or put your face on a celebrity body. Yes, I said put your face on the bodies of celebrities in well known popular pictures, lol. It looks like most people use the magazine cover the most.

Hairmixer: is a web based program that allows you to put different hair styles on your face or another face. Now this is not really beneficial as a business tool, we just think it downright funny. You can either upload two photos or use the celebrity gallery photos. A friend of mine used this tool to to see what her and her boyfriends kids would look like...did I say it was a hilarious tool?

Magmypic: is a web based program that lets you put any photo on a magazine. Much like Write on It, this site has pre-generated magazines, not the legitimate ones on the stand.

Hollywood Hair: though not really used for your business, it is entertaining....just upload your photo and try on different hairstyles made popular by celebrities.


Read more
Wednesday, September 15, 2010
EASILY MAKE YOUR OWN STAMP: A TUTORIAL

Branding your company or even just making your packaging unique is a constant learning experience. In a previous Post " Tag It : Your Creative Packaging" we talked about different low cost ways to make your packages lovely and of course, we touched on stamps.
Company stamps are a great and easy way to brand your company on packaging, but what if you wanted alot of different stamps designs but cant purchase them all?....make them
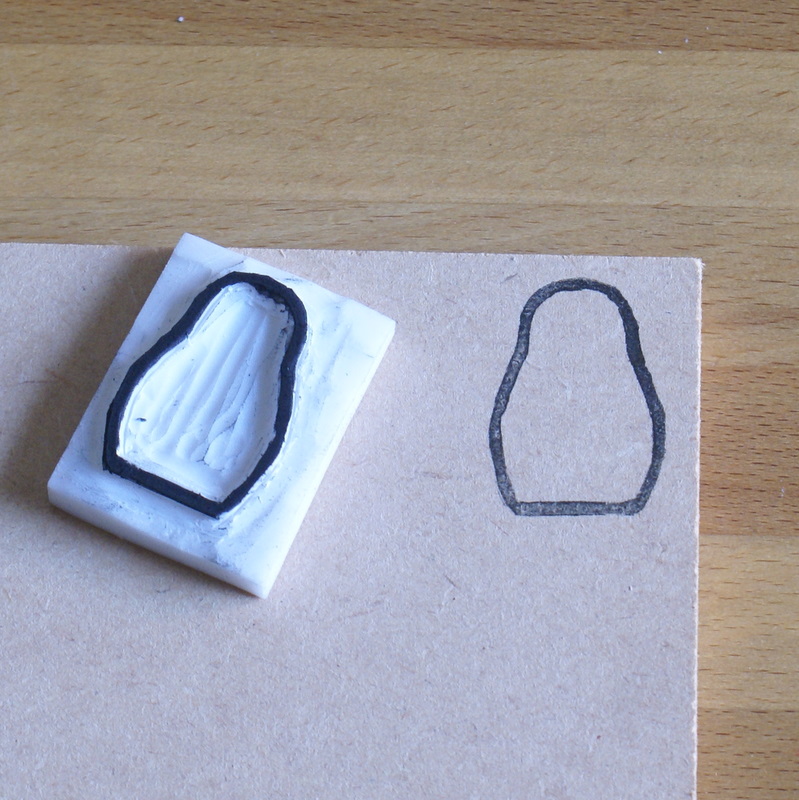
Make Your Own Stamp Tutorial from Art Mind, is a nice step by step pictorial on how to make them.


You will need a view easy to find tools:
  • lino cutting set (to cut out design)
  • pencil (to draw your design)
  • sharpie marker (to outline your design)
  • ink (to stamp)
  • Gum
Notes & Resources:
Lino Cutters
  • You can get Lino Cutters from a Variety of places like Here and Here
  • You should get the set that comes with a variety of heads as opposed to just one
  • This will give your more tools for better precision, on those finer cuts in corners
Rubber Stamp Gum


  • Can be bought by the sheet and then cut down to size. This is good for stamps of various sizes that you may want to do.

  • BUT ALSO TRY GUM ERASERS (also called "Soap" Erasers), these blocks are the perfect size for stamps and because they are thicker in depth, you will not need to mount them onto wood or etc. Just remember to check the size of the gum eraser to make sure it is big enough for your needs

  • Just remember its better to make it bigger and cut is down, then the other way around.

  • Gum Erasers can be purchased by the box at : Jerry's, Amazon, Artist Supply, School Specialty


    ALSO, if you really don't feel like purchasing the "Gum Erasers" you can use a Cut Potato....yes I did say a Potato. Remember how big the Potato Stamp Crafts were back in the 70's? lol. The only problem is that is will not last forever, but if put in the fridge a little longer than left out.
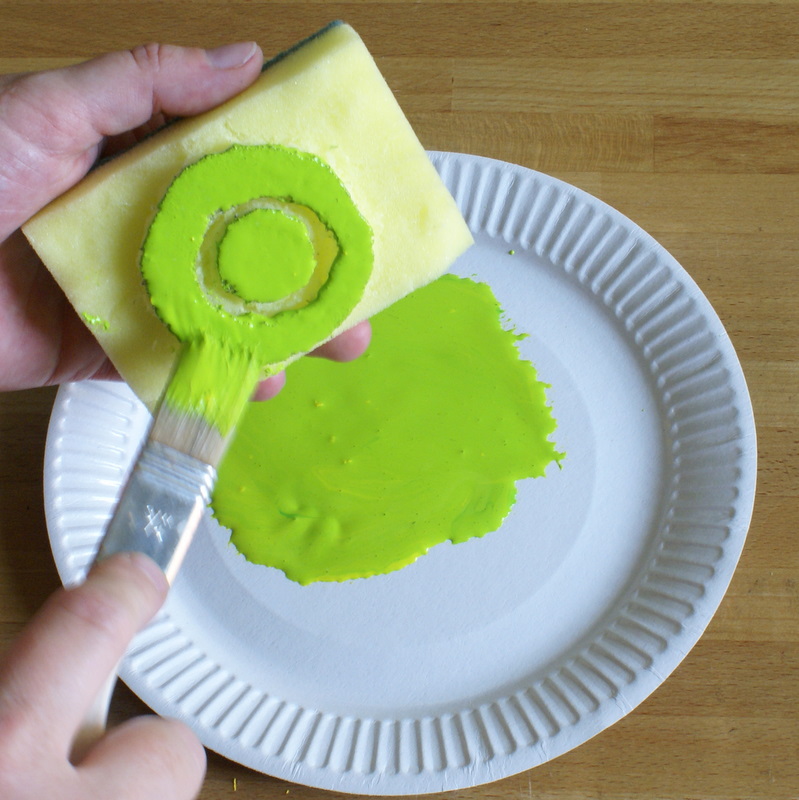
    OR you can use a Foam Sponge, like the ones that you use to wash your dishes. Easily found in the dish washing isle in the supermarket or to buy in bulk try the Dollar Store. To cut foam sponge use an Exacto Knife instead of Lino Cutters.
    Just remember that the Sponge Stamp applies ink differently than a solid Gum Rubber Stamp, just try different applications out to find what method works best for you.


stamp and foam picture courtesy of Art Mind

Read more
Friday, September 10, 2010
MAKE YOUR OWN CUPCAKE WRAPPER:A TUTORIAL

As you know from following this blog, we love our sweets...especially cupcakes. So for those of you who like to dress up your cupcakes with pretty wrappers, you can know make your own.
This tutorial is brought to you by Judy in Her Natural Element. She also has great recipes , especially cupcakes for you to try.
We suggest the Candied Sweet Potato with Mascarpone Frosting or the Grace Cupcakes.
Head on over to her Cupcake Wrapper Tutorial to make your own.
Note: These use patterned paper, but you can personalize your own for a party, birthday or etc just by designing and printing out pattern on heavy cardstock. Just remember to extend design (bleed if all over patter like pic) past edges of template to make sure when you cut you don't cut off design.
Read more
Saturday, September 4, 2010
TOOTH PILLOW: A TUTORIAL

When I saw this , I thought it was a little creepy as well as cute. Think about it...you are sleeping and look up to this giant , smiling, tutu wearing tooth...it can be a little creepy, BUT this is cute as well.
This is brought to you via mmmcrafts, and she actually did two versions, a ballerina for a girl and policeman for a boy. This little craft is very easy, even for people who don't sew and it takes very little supplies. The nice thing about this is that if you dont like the ballerina theme, you can really customize it to your taste (cowboy,princess, or just plain). I think you can even "scale" this up, to make a giant tooth pillow( but the thought of that staring at me from the couch gives me the willies).Thought this is hanging, you can definitely take out the ribbon to make it a pillow that you just lay down..so have fun making your tooth pillow :)


There are many different versions that can be made with the basic tooth pillow template, mmmcrafts has made many versions for her site, so play around and come up with your own...I am waiting to see the Cowboy Version, lol


TOOTHPILLOW TUTORIAL
TOOTHPILLOW TUTORIAL UPDATE
POLICEMAN THOOTH PILLOW
Read more