Open top menu
Showing posts with label photo editing. Show all posts
Saturday, June 7, 2014
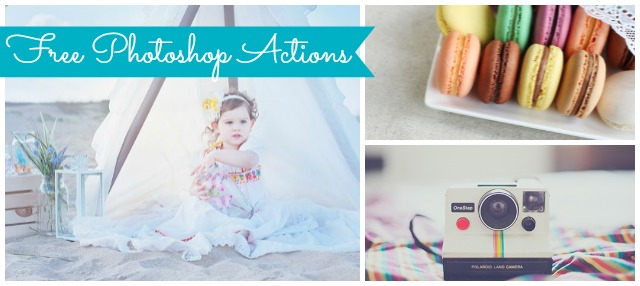
Download Day: Free Photoshop Actions


How many of you use Photoshop? If so, then you have to be familiar with Photoshop Actions!
Photoshop Actions take your photographs to the next level, whether its adding a lighting effect to touching up a portrait......basically its like putting an filter on your instagram photo, lol

What are Photoshop Actions? Simply put, a Photoshop Action  is a file(.atn) that contains a sequence of steps (or actions) that can be applied all at once to a picture you are working on with the simple click of one button.

There are several popular companies that offer Photoshop Action bundles for a variety of effects like Florabella or Summerana, but if you are not a photographer or are  more "recreational" users, you many not be able to "invest" in these actions bundles.

The following are a few free Photoshop Actions ( some from the two companies above) that you can create a variety of effects from.  Though most of these actions show portraits/landscapes, these are also great for product photography as well. The photoshop actions numbered 2, 5, and 13 are great for those product photos that you need to lighten with the click of a button.

Also, at the end of the post there good video on how to install and use the actions for Photoshop. Please note that some actions may require an earlier version of Photoshop, but most are compatible with cs2and higher.

You can download all of these Photoshop Actions below at one time HERE.


1. via

2. via
 

3. via
4. via

5. via

6. via

7. via

8via

9. via 
10. via

11. via

12. via ( 32 different ones)

13. via

14. via


Installing Actions                                                                                                       
There are a few ways to install your actions.  The following is one of the easiest ways to install them.
  1. After you've downloaded the zip file containing your actions, you'll need to unpack the contents of the file ( for most people who do not have an program that they use for this like winrar or etc, you can just right click the file and select "send to" to save to your computer).  Once the file has been extracted, you should  reveal a new folder containing the .ATN file for your new actions.
  2. You can either drag this file directly into your Photoshop window, or you can use the action panel drop down in Photoshop to select your .ATN file and load your actions
  3. Once loaded....Viola! its ready to use.
Using Actions                                                                                                               
  1. Select the layer you want to apply the action to.
  2. Select the action you want to use from your action panel.
  3. Hit the "play" button down at the bottom of the panel.
  4. You will see Photoshop "go thru" the sequence ( it will look like a rapidly playing movie) and at the end the filter will be applied to the picture.

The following is a very informative, short video on how to install and use the actions via Photoshop Video Academy.


Blogger-Signature
Read more
Sunday, March 10, 2013
$12 Photography Set Up

If you have not taken at look at Handmadology's post about a $12 photography set-up, you definately should!
Made with foil and a cardboard box, this setup by  photography pro Mariano, will definately get the job  done.....who needs a fancy lightbox anyway, lol


Blogger-Signature
Read more
Friday, June 24, 2011
TABLE TOP PHOTOGRAPHY WITH ONE LIGHT

I actually saw this by way of ApertureAgog and thought this was fantastic "Do It Yourself" photography. This is a great tutorial showing how to construct an image using one light and several simple DIY light reflectors.
For those of us who are constantly striving for better photos, I think this is a great way to "manipulate" the light source in your favor.......because I cannot be the only waiting waiting for a specific time of day to utilize the best sunlight in my house :P
You can easily get the "clip on" or "clamp" lights they sell in home depot and a couple of mirrors to easily make your photos "dynamic" and if you can't find mirrors around your house or at your local thrift or Dollar Store, put some foil around a piece of that cardboard box that you have left over from something you bought....just make sure it goes on nice and smooth.


Read more
Thursday, March 17, 2011
PHOTOSHOP ALTERNATIVES: SOME OF THE BEST FREE PROGRAMS FOR YOUR BUSINESS

I can't live without photoshop ! Not just for my business, but for my life as well. I know that there are alot of people out there who either can't afford the ever rising price of Adobe Photoshop or who just dont have time nor patience to learn who to use it....Sometimes you need tools such as layers, filters, and other effects and apps such as Picnik and Picasa just don't cut it. So we've rounded up some PHOTO EDITOR ALTERNATIVES TO PHOTOSHOP that pack the punch of Photoshop's bells and whistles without the price. They are easy to use and each program has it's own pros and cons with some having a more "photoshop-like" look to their appearance.

Picnik: arguably the most popular web-based photo editor and now it’s now integrated with Flickr. We know we stated that "sometimes you need more than this program can offer" , but we would be remiss , if we didn't add this popular program to the list.
Pros: web based with new Flikr integration makes it easier to host and edit photos
Cons: sometimes they have problems with server overload which makes uploading pics longer

Photofiltre: is a downloaded app that is very reminicent of photoshop.This app eliminates layers and some user controls for certain tools but leaves plenty of tools for color, saturation, and effects.
Pros: has lots of tools for color, color correction and effects
Cons: missing layer tools and certain "advance settings" for tools for better control

Paint.Net: is a downloaded app that is very similar of photoshop.DON'T LET THE NAME FOOL YOU...THIS IS NOT THE "PAINT" PROGRAM THAT IS INSTALLED FREE WITH WINDOWS.
Pros: has tools for layers, curves and other "photoshop" similar goodies
Cons: multi step download process , lacks sophisticated color correction/alteration and selection tools


Aviary: is one of the newer sites on the block that combines illustrator like vector features with photoshop image editor features. Also has a cool "music editor" tool and just added a "HTML editor" as well that lets you edit pictures directly on your web site/blog.

Pros
: has multiple tools/effects on one site with easy "point and click" interface.
Cons: lacks the previews of many filters/effects on the site, so if you don't know what each tool does, it can be time consuming to "try it out"


Splashup: is a online web app that is one of the closes "knock off" of photoshop I have seen in appearance as well as tools.It has a sleek modern appearance that interfaces with flikr, picasa and facebook.
Pros: if Photoshop was a 10 then Splashup would be an 8
Cons: lacks curves, levels and several other lesser used photoshop tools.


Photoshop Express: is actually from Adobe and has finally gotten on the web app bandwagon. You do have to create an account to use the site, but if you want a "true" photoshop image editor without the price, this is the app for you.
Pros: has 2G of storage space with every account and able to share your albums like Flikr
Cons: lacks the ability to layer or manipulate images like photoshop.It also has even less tools than the pared down "photoshop elements"


flauntR: is a online web app that is sectioned by image use. From a section to create online profile pictures for your blog or social media account to a section that has dozens of fancy fonts and effects for all sorts of photos and backgrounds .One of the more interesting sections is the one that can instantly bring the essence of world famous paintings onto your photos in one click.


Pros
: has an abundance of image tools, something for everyone and easy "point click" usage
Cons: is more about "photo manipulation" and less about "photo editing"...if you want your photo to have different effects (painting, mosaic, puzzle or backgrounds) then this is the app to use.
Read more
Monday, September 20, 2010
FUN PHOTO EDITORS: TAKING PICTURES TO  ANOTHER LEVEL

I am always on a quest to find a way to enhance as well as take better photos. If you have Photoshop and can actually use it , lol...then there is never a problem executing your own creations.
But for those of you who are not Photoshop proficient, there are several great online photo editors that can take your photos to the next level. These are not just for your business, they can be used for your blog or just a fun way to spice up those digital photos.


The following are some of the best


Loonapix: is on of my favorties, they have so many templates to choose from. Not only the more "stylized, artisic" ones but some very funny, celebrity interfaces as well..This one is a must see:)


beFunky: allows you to add some really lovely effects to your photos as well as the standard photo effects like lighten and darken. This easy interface allows the user to create great artistic effects without any " technical' knowledge.


piZap: is one of the more entertaining photo editors that allows you to either upload your own photos or use your webcam. Its free and online, so no need to download anything. If you want to see what it can do , just use on of the 4 demo photos and play around.


Photofunia:
is a hilariously fun web based tool that allows you to upload your photos and apply different cool effects to them. Scroll through over 100 different photo effects or if you are looking for something in particular selected the by "categories". Each effect has photo requirements and they state them right above the the upload button. When I tell you I had some fun with my pics, I really did! You can have a celebrity holding your portrait, to a large size banner in Times Square. This tool is definitely worth a look, just make sure to hit the "Download File" button, ad they usually have some add running above it and if you are not careful you could hit the ad for something.


Poladroid: is the easiest way to make a high resolution polaroid-like picture from your photos. You do need to download the "app" to your desktop (in the shape of a polaroid camera) but its free and small...This app is awesome!


My Heritage: is a web based program from the My Heritage geneology website that lets you upload photos and find out which celebrity closest resembles you. There is also a tool that lets you upload two photos and it will morph them together, so if you wanted to look like Halle Berry or Angelina Jolie, just put a photo of them in and it will morph you into them in a series of photos.

Write on It: is a web based free program that lets you create cards, make your own magazine covers (from major magazines like People, Wired, Redbook, etc) or put your face on a celebrity body. Yes, I said put your face on the bodies of celebrities in well known popular pictures, lol. It looks like most people use the magazine cover the most.

Hairmixer: is a web based program that allows you to put different hair styles on your face or another face. Now this is not really beneficial as a business tool, we just think it downright funny. You can either upload two photos or use the celebrity gallery photos. A friend of mine used this tool to to see what her and her boyfriends kids would look like...did I say it was a hilarious tool?

Magmypic: is a web based program that lets you put any photo on a magazine. Much like Write on It, this site has pre-generated magazines, not the legitimate ones on the stand.

Hollywood Hair: though not really used for your business, it is entertaining....just upload your photo and try on different hairstyles made popular by celebrities.


Read more
Tuesday, May 4, 2010
PHOTO EDITING TOOLS FOR YOUR BUSINESS

The number one question always asked by crafters is about photos. For those of you who may not be Photoshop savvy , here are two tools that may make your photo editing quest a little easier.


Fotosizer:
This tool resizes your photos in just 3 easy steps - 1. Photo selection, 2. select resize settings, then 3. Start the resize.
You can also shrink JPEG image files, along with other supported formats, and dramatically reduce internet transfer times, enabling you to quickly and easily prepare your image collections to be published on the web.

Irfanview:
This is a free way and easy way to watermark all your images to discourage their unauthorized use on other websites or blogs. It can actually watermark entire sets of images at one time and it can also resize images as well, so you dont have to use more than one program. You do have to download this to your computer, but the good thing is that it is only about 1 MB in size, so it takes up the same amount of space that a regular document would on your computer.
Read more
Friday, December 18, 2009
TAKING A GREAT PHOTO: TIPS TO HELP YOU

I am always on the quest for better ways to take a great photo. I am no professional photographer, but have found a few things that are useful to the average joe trying to photograph there work.

These tips are for the "point and shoot" digital camera crowd, of course if you are more advanced in your photography knowledge, then this is standard knowledge for you.

KNOW YOUR CAMERA:
That means read the manual and know the different settings and modes on your camera. There are usually preset for Scenery, Nighttime, action , and other scenarios that you can use.Yes, some models are better than others, but if doesn't matter what amount of money you spend if you can't work it when you get it home. I suggest 10Mega pixels as the minimum for a digital, some people may argue with me , which is fine, but I think this is the least you can get to take a decent photo.The mega pixel rating of a digital camera determines how much fine detail you can capture in your shots, so the higher the mega pixel, the more detail in the photo.

MACRO MODE IS YOUR FRIEND:
Most digital cameras have a macro mode. This setting is great for taking close up shots of your products like rings or smaller objects. Most of the time the macro mode is represented by a flower symbol. Just turn on macro mode (whether a switch or button on camera), then get as close to it as your camera will allow. Make sure you allow the camera to focus properly before depressing the shutter button fully.

SHAKY HANDS = SHAKY PICTURE:
Sometimes you think you are holding your camera steady only to find out after the picture is taken that you weren't. Alot of cameras now have an "auto shake" feature. This is represented on my camera with a picture of a hand with wavy lines on either side of it. When this is turned on it automatically stabilizes the picture. This is good if you are a little shaky or if you don't have a tripod. The only downside to this is that on most cameras this feature is for auto mode only, so you will not be able to manually tweak settings like Iso, brightness and etc.

WHAT THE HELL IS ISO SETTING:
The ISO setting of a camera controls it's sensitivity to light. If you're taking a photo of a still object, like jewelry, then always use a low ISO setting. It allows for a longer shutter speed and produces a cleaner image. If you're shooting a moving object, like a child in one of your items, then a higher ISO setting of say 400 would be better. Do take note, however, that a higher ISO setting gives a faster shutter speed and requires less light.

EDITING THOSE PHOTOS WHEN YOU CAN'T MAKE SENSE OF PHOTOSHOP:
No matter how great a photo you take , it will most likely be needing some sort of editing. Whether its cropping the image to make it more dynamic or fixing the light/other color problems. The most common software is photoshop, but for some people its too complicated or too expensive. They do offer a "downgraded" version called "Photoshop Elements" but there are other alternatives. The following are three good free photo editing programs

Picnik- is a web based site which makes photo editing simple. You can have Picnik "auto correct" photos for you or you can manual do it in "advanced mode". The site is free to use with registration optional and it interfaces with your Flikr account. If you plan on using it frequently, then it will probably be best so register(free) to keep track of your photos.

Picasa 3- is software from google that you download . Since this is from Google , it makes sharing your photos easier as well.

Snipshot- is free photo editing software online similar to Picnik. One of the things that makes it interesting is that you can apply effects to your photos , similar to filters in Photoshop. They do offer a "Pro Account" , for a monthly free or they do a have "2 week" free that gives you access to more tools.

Gimp-is software that you download as well. This is a little more advanced than Picnik, but very easy to use.

Aviary- is free photo editing and web tool that really is geared toward design and creation. Similar to Photoshop, it allows you to not only apply effects to your photos, but also create other designs, like that all important Store Banner. They even have tutorials on their blog on how to make an "Etsy Shop Banner" using there product. This may be good for some of you who are a little "techno challenged" but still want a nice banner. If you are looking for more photo editing options than Picnik , but are not ready for the challenge of Photoshop, then Aviary is the best bet for you.

Paint.Net-is software that you download for computers that run Windows. It edits photos with similar tools to Gimp or Photoshop .NO THIS IS NOT THE MICROSOFT PAINT PROGRAM THAT YOU FIND FREE IN YOUR WINDOWS APPLICATION. This is a little more advanced thank the Microsoft paint program as it was originally intended to replace that free program. SO though every knows I am not a fan of Microsoft Paint as a graphic design program, if you are use to using Microsoft Paint, then this may be an alternative to you.

These are just a few programs, we think it really depends on your skill level and needs as to which is better for you . We suggest that if you are unsure, try them all out and see what works best for you.
______________________________

{CREATING BETTER PHOTOS:TIPS AND RESOURCE LIST}


White Balance to Make Your Photos True to Life
Staying Sharp: Achieving Clarity and Crispness in Your Photos
The Portable Lightbox: Easy way to achieve professional photos
How-to Photograph Jewelry


*If you know of any great tips to help take a better photograph let us know!
Read more
Tuesday, November 3, 2009
Taking a Great Picture: A Light Box Tutuorial

I am always on the quest to find ways to take a better picture, no matter how good my photos are ( and yes I know that that is debatable, lol). So while doing a little Virtual Labing, another seller turned me onto to a place to build my own light box.

I love the natural white light of daylight, but unless you are in a certain spot it will never be even everytime and sometimes, I just don't feel like photoshopping everything...I do have a life, so a light box is a way to take care of that. For those on a budget you can make your own light box with a couple of cheap supplies and it will lessen your "photoshopping time".

This DIY Light Box Tutorial comes from a blogger by the name of JYOSEPH. You can get the clip-on lamps from Home Depot for a few dollars, which is better just in case you have to move around the lamps. If you do not want to purchase lamps and are on a budget, I suggest making sure to buy a "soft white" bulb. It was also suggested an Ott Lite Bulb , which is a "true" white light in a regular lamp if you don't want to spend money on clip on lamps.

If you are not crafty or just don't want to to take the time to make this, then why not try a Portable Light Cube. These are soft white outer material light boxes that usually come with four background cloths(white, red, blue and black)that you can interchange inside the box (as pic). Of course if you want another color background you can easily add your own.

These can be found on Ebay or Amazon for $10 up to $50 , some even come with two small professional lights(depending on seller). These are good if you don't want or have a place for a permanent light box (no matter how small). They easily "pop" open when you pull out of the bag (size of medium size pocketbook) and have a removable wall that has a slit in it for you to stick your camera lens if you want to make sure no shadows show. Or you can leave the wall off (as pic) Of course you still need lamps and a light to shine on box, but the best part when you are through you can store in a drawer or move around as needed.


tutorial and photos courtesy of jyoseph
Read more