Open top menu
Showing posts with label tutorial. Show all posts
Saturday, June 7, 2014
Download Day: Free Photoshop Actions


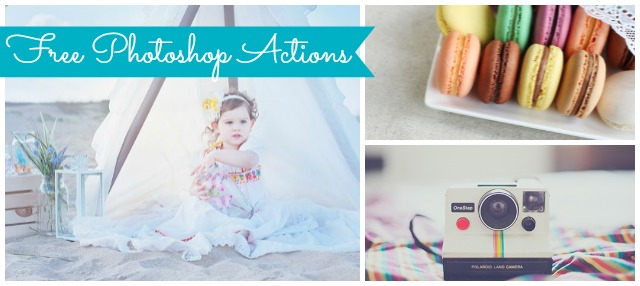
How many of you use Photoshop? If so, then you have to be familiar with Photoshop Actions!
Photoshop Actions take your photographs to the next level, whether its adding a lighting effect to touching up a portrait......basically its like putting an filter on your instagram photo, lol

What are Photoshop Actions? Simply put, a Photoshop Action  is a file(.atn) that contains a sequence of steps (or actions) that can be applied all at once to a picture you are working on with the simple click of one button.

There are several popular companies that offer Photoshop Action bundles for a variety of effects like Florabella or Summerana, but if you are not a photographer or are  more "recreational" users, you many not be able to "invest" in these actions bundles.

The following are a few free Photoshop Actions ( some from the two companies above) that you can create a variety of effects from.  Though most of these actions show portraits/landscapes, these are also great for product photography as well. The photoshop actions numbered 2, 5, and 13 are great for those product photos that you need to lighten with the click of a button.

Also, at the end of the post there good video on how to install and use the actions for Photoshop. Please note that some actions may require an earlier version of Photoshop, but most are compatible with cs2and higher.

You can download all of these Photoshop Actions below at one time HERE.


1. via

2. via
 

3. via
4. via

5. via

6. via

7. via

8via

9. via 
10. via

11. via

12. via ( 32 different ones)

13. via

14. via


Installing Actions                                                                                                       
There are a few ways to install your actions.  The following is one of the easiest ways to install them.
  1. After you've downloaded the zip file containing your actions, you'll need to unpack the contents of the file ( for most people who do not have an program that they use for this like winrar or etc, you can just right click the file and select "send to" to save to your computer).  Once the file has been extracted, you should  reveal a new folder containing the .ATN file for your new actions.
  2. You can either drag this file directly into your Photoshop window, or you can use the action panel drop down in Photoshop to select your .ATN file and load your actions
  3. Once loaded....Viola! its ready to use.
Using Actions                                                                                                               
  1. Select the layer you want to apply the action to.
  2. Select the action you want to use from your action panel.
  3. Hit the "play" button down at the bottom of the panel.
  4. You will see Photoshop "go thru" the sequence ( it will look like a rapidly playing movie) and at the end the filter will be applied to the picture.

The following is a very informative, short video on how to install and use the actions via Photoshop Video Academy.


Blogger-Signature
Read more
Monday, November 18, 2013
Best Play Dough Recipe


I am just gonna admit it....I love some playdough, so when I came across a recipe called "The Best Playdough Recipe" , I had to try it and I must say , it is pretty good :)

{INGREDIENTS}

1 C Flour
1 C Water
1/4 C Salt
1 TBSP Vegetable Oil
2 tsp Cream of Tarter
Food Coloring (actual coloring or a kool-aid packet will do)
Sparkles (If you wanna be a fun mom!)
Sauce Pan and Wooden Spoon
Little helping hands.

adelynSTONE, suggest to use less salt as not to dry out the dough and the Cream of Tarter is to hold it all together. I think that it is what makes the dough last. She also put her play dough in "snap" lid babyfood containers,but you can certainly put them in the plastic snap lid containers that you can purchase at any Dollar Store. I also like the pretty pastel colors that she used as these would make great party favors with a customizable label.


Don't forget our other popular post for EDIBLE PLAY DOUGH

Blogger-Signature


For complete tutorial go to adelynSTONE

Read more
Friday, August 16, 2013
D.I.Y: Rainbow Fan


This easy little D.I.Y is brought to you by  Steph at Modernparentsmessykids.

Paint your fan blades in primary ( red, yellow & blue) . You can add secondary and/or tertiary color  (a color made by mixing either one primary color with one secondary color....ex. yellow green, red orange, etc) depending on the number of blades) and they blend into a lovely rainbow when turned on!

Suggestions:
  1. Remove the front of the fan. All fans have clips and/or snaps to open the fan.
  2. Some fans also have a screw front that you can remove the whole blades 
  3. Thoroughly clean your fan before you paint it. Clean off any dust or particals and let dry.
  4.  Use a foam brush to paint the color on your blades. You can remove blades or paint them while attached to the fan.
  5. Make sure to thoroughly dry your fan before you turn it on.

Please note that at faster speeds it may looked a little brown  because the primary colors mixed create brown. It looks much prettier at the lower speeds.

Blogger-Signature
Read more
Tuesday, July 16, 2013
Washi Tape Wahoo! Cute Things to Washi

In case you didn't already know, crafters and non-crafters alike are obsessed with Washi Tape . This decorative masking tape from Japan has really evolved in design with its growing popularity. There was a time when only a few online retailers had it available  for US buyers, but now , with the influx of alot of other retailers ( and Ebay, lol), the selection of patterns and colors is outstanding . So much so that you will rarely find the same patterns being sold by different retailers.


The following are a few great ideas for using Washi Tape

1.Washi Tape Flag Banner (instructions here or video)


2.Washi Tape Key Board: ( here)
Please thoroughly cleaned the keyboard with rubbing alcohol to remove any dirt or oil that might keep the tape from sticking. Create a template from cardboard to more easily cut the length of tape needed for each key. Snip off the corners to keep them from snagging and peeling off the keys. ( you can easily stick and restick in case you don’t get the placement perfect each time)


 3.Washi Twisty Ties (instructions here)


4.Washi Clothes Pins (instructions here)


5.Washi Magnets (instructions here)


6.Washi Tags (instructions here)


7.Washi Blinds  ( just start tapping)


8.Make your own Washi Tap (instructions here)


9.Organize with Washi: power cords, planters, clips and your appointment book


10.Washi Mani/Pedi


 11.Washi Tape Wall Art (here)


12.Washi Tape Puzzle (instructions here)


Blogger-Signature

Read more
Sunday, June 2, 2013
GRADE SCHOOL NOTE FOLDING: A LITTLE TUTORIAL

I remember the good ole days when you would pass a note to the person you liked or gossip with your BFF . Even though you are no longer in class, you can still keep it old school and send your note with some nostalgic flair. The following are a few creative ways to fold your notes, whether you are putting them in an envelope or handing them off to the person.

Enjoy and Happy Folding!

FULL TUTORIAL HERE

FULL TUTORIAL HERE

FULL TUTORIAL HERE

FULL TUTORIAL HERE


Blogger-Signature
Read more
Thursday, May 16, 2013
FAUX BAKER'S TWINE: A TUTORIAL

I came across this tutorial from UkMaryanne via The Frugal Crafter and though I like original baker's twine....this is pretty crafty ;)

All you need is white crochet cotton string, which can be easily purchased at any craft store and markers in the color of your choice. The Frugal Crafter used ProMarkers, or any other permanant marker like Pantone Markers, that you can get from any Art Supply Store. I suggest getting the Sharpie Glam Markers ,which are sharpies in a wonderful range of colors that you can get at any office supply store.
Gotta admit.....looks like real thing doesn't it? Don't forget to take a look at the video "how-to" below so that you can make your own "Faux Baker's Twine".


pictures courtesy of The Frugal Crafter
Read more
Sunday, March 10, 2013
D.I.Y: Nail Art

Normally, I am not into the crazy nail art, but I came accoss this D.I.Y from the Beauty Department and thought they were pretty.... yet tasteful for the office, lol
I love the color comobos and though they used Robins Egg Blue, I think the Bow Mani would look great with pale pink, black and white.
They use the Essie brand of nail color (that you can get at Target or your local drug store like Walgreens), but  I actually prefer the OPI Brand of Nail Polish.....of course you can use any brand that you want.......( even the Dollar Store Brand, lol)


Full tutorial for the Turquoise  and  Gold Stone
Full tutorial for the Bow Manicure


photos courtesy of the Beauty Department
Blogger-Signature
Read more
Saturday, January 12, 2013
D.I.Y : Closet Book Nook

I must say that this Closet Book Nook by Thrifty Decor Chicis fantastic and easy to do. By taking an unused closet ( that's an oxymoron if I ever heard one) and adding shelves and seating, you can make a fabulous space for reading. Though it is children's size, they do actually have a pic of an adult in there, though how comfortable they would be for an extended amount of time is debatable.

I could definitely see a "store-able" ottoman, that can easily be placed underneath the bench ( where the basket of books are located) that an adult can pull out and lounge comfortably.

Don't forget to take a look at our Children's Play Kitchen D.I.Y as well.


pic name

Blogger-Signature
Read more
Sunday, October 28, 2012
Cute Handmade Halloween Costumes

With Halloween fast approaching, some of us are still in need of a costume for the kids. The following are a few costume inspirations and some cute D.I.Y/tutorials .........If all else fails, you can keep it old school and  cut two holse in a sheet to be a ghost!

Sock Monkey Tutorial via GrosGrain Fabulous


wolfpup childs costume UP Costume
Wolfpup Tutorial via Rust and Sunshine Old Man From Up ( no tutorial, just cuteness!) via Auburn Soul Photography

Raining Cats and Dogs by RealSimple and really all you need is stuffed animals and a glue gun!


Bat Costume Tutorial & Download via AlphaMom

Halloween No-Sew Mask Download via Tutorial by PrudentBaby
Blogger-Signature


Read more